A panel voltmeter can be used to build a milligram-range electrobalance, which turns out to produce surprisingly linear measurements.
Using a bare-bones panel meter electrobalance, I attempted to measure the proof of alcohol by tracking evaporation over time.
Electrobalance
A typical panel meter passes a current through a coil to generate a magnetic field, which generates a force in the presence of a permanent magnet and causes the needle to move.
The meter I had at hand is a 0–15V voltmeter, so it includes a 75k resistor in series with the coil in order to present an appropriate input impedance for that voltage range (think Thevenin and Norton equivalents). The coil has a DC resistance of approximately 520 ohms, which means the full-scale current for the coil is about 200 microamps.
To convert the voltmeter into an electrobalance, I replaced the 75k resistor with a 1k series resistor and connected an adjustable voltage power supply for testing. This range permits currents from a few hundred microamps to several milliamps, which is enough to lift small loads without destroying the coil. However, it’s worth noting that if accuracy were a significant concern, coil heating resulting from the higher-than-rated currents would likely be non-negligible.
I turned the meter on its side and placed the load on the needle, then increased the power supply voltage until the needle was centered and read the current using a multimeter. One drawback to this simple system is that for repeatable measurements it requires care to ensure the load is placed on the same position along the needle and the needle is raised to the same center point every time.
Linearity
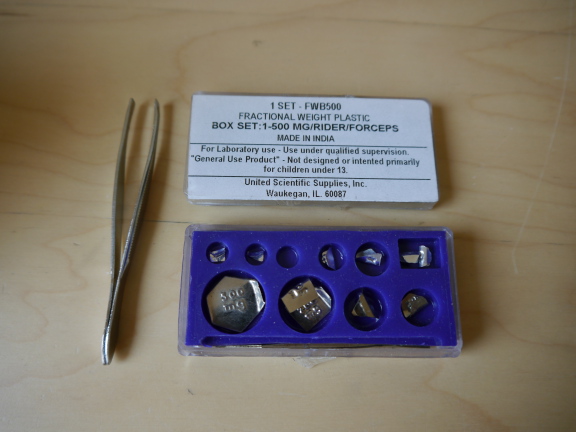
To test the linearity of the scale I used a set of calibration weights from Ebay. While they didn’t include a traceable calibration certificate (or make any accuracy claims at all), they were very inexpensive.
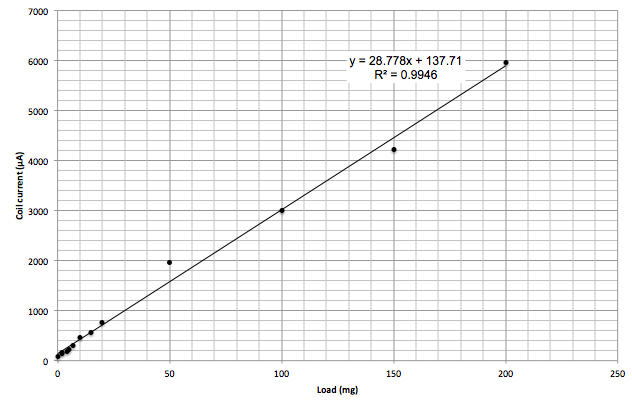
I made measurements manually across a range of load weights. The plot confirms that the electrobalance is at least linear enough for further investigation.
Spirits
I suspected it might be possible to identify the percentage alcohol in a solution by measuring the evaporation curve.
Since alcohol evaporates more easily than water, more alcohol than water can be expected to evaporate at first, and as the alcohol concentration drops the overall evaporation rate will also slow until it approaches the evaporation rate of pure water.
The evaporation time constant can found by an exponential fit to .
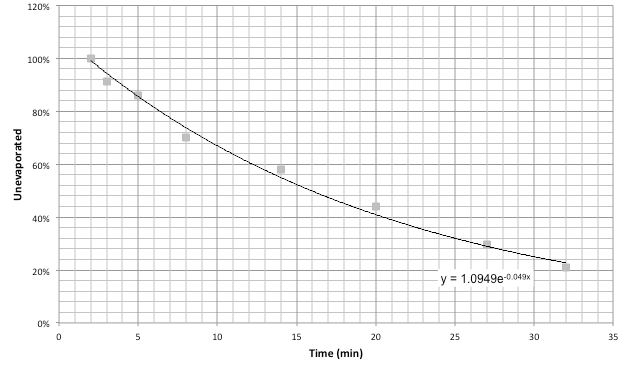
I took data by weighing cotton samples dipped in several solutions: tap water, isopropyl alcohol, and ethanol at various proofs.
However, from this data, it does not seem to be possible to directly calculate alcohol proof from time constant, though the general trend does seem to hold.
Eliminating the sources of error related to manual measurement and taking more frequent data points during evaporation might provide more conclusive data. However, it may be the case that a significant component of the evaporation time constant is determined by the surface area of the sample. With such small samples sizes, it may not be possible to get repeatable measurements without carefully controlling the cotton dimensions and sample volume.
| Sample | Evaporation time constant |
|---|---|
| 50% IPA | 28.6 |
| water | 76.9 |
| 20% EtOH | 22.2 |
| 40% EtOH (Slivovitz) | 15.4 |
| 40% EtOH (Slivovitz) | 20.4 |
| unknown EtOH #1 | 20.4 |
| unknown EtOH #2 | 18.5 |
Automation
Next, I attempted to automate the measurements by adding a photointerruptor to detect the needle position. When the needle is lowered, an electrical tape flag on the needle blocks the infrared LED from illuminating the phototransistor. A microcontroller applies power to the coil using a PWM-controlled FET. When the needle begins to raise, the microcontroller detects the change in phototransistor output.
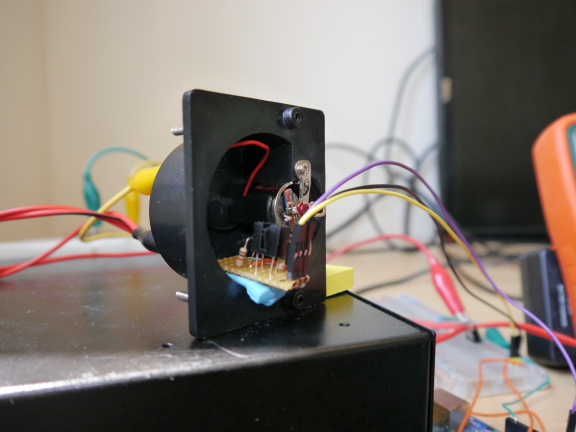
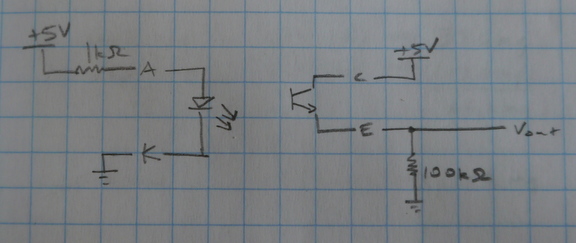
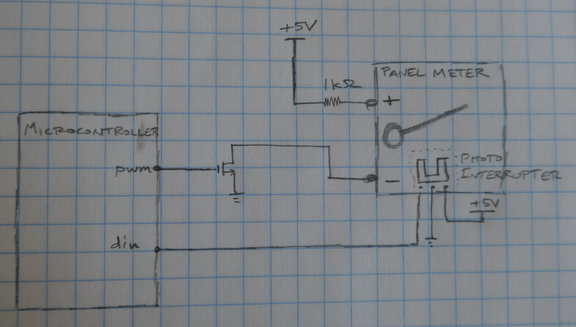
As a first attempt, I programmed the microcontroller to simply ramp the PWM duty cycle until the phototransistor signal changed. This did the job, but had to be run painfully slowly to produce accurate results. When the ramp rate was increased, the needle would overshoot, leading to significant variability between measurements.
I made a quick pass at implementing PID control, but the digital-only feedback and relatively slow response made it difficult to find parameters that would allow the needle to settle. Since I didn’t want to spend all day tuning control algorithms, I had to leave this part of the project for another time.
Inspiration and References
The inspiration for this project comes from an article in the Amateur Scientist column of Scientific American that I found years ago, Down Among the Micrograms.
Expanded versions of that article also appeared in several issues of the Society for Amateur Scientists newsletter (PDF mirror) (Forth source code mirror).
There are a few other incarnations that are worth a look:
Digital Balance (sci-spot.com)
Weigh an Eyelash—Build a Microgram Scale (Youtube video, Paul Grohe, Texas Instruments)
STK-500 based microgram scales (avrfreaks.net forum thread)